Tuesday, July 14, 2020

Sooo... thinking about learning to sculpt...


I want to learn to sculpt.  Because Clearly I need another hobby.(HA) I know that's a weird statement from a miniature tackmaker but I am saving and saving to retire soon and when I do, I want to do more "regular" art.  I put up this board probably in early june and started filling it with sculpting references.  I also have been rabidly watching Morgen Kilbourn R's videos and Sarah Minkiewicz B's work to sort of mentally figure out how things may go together.

I wanted to do a cantering arabian on the bit like the photos above.. and then I found out this week that the ultra talented Monika West is working on a sculpture in this exact pose right now. Mine will probably NOT be as good as her's so no worries there.. lol  And My first few sculpts probably no one will ever see anyway..  I'm also considering doing some breyer/stone customs before I jump headlong into sculpts..

This doesn't mean I'll give up tack. I'll probably make more tack here and there and retirement is a good 10 years away so don't worry.. more pieces to come :)


Sunday, July 05, 2020

The Miniature Medieval Armor Bridle

Sunday July 5th.

Today I'm working on making a bridle for my miniature armor set.  I've looked at as much documentation and photos of real armor at the various museums as I can.  I am surprised by the amount of bridles that are made from velvet.  I assume that this is due to the wealthy people at the time using extravagant materials to show their wealth.  I also know from reading through the years that real leather breaks down over time so there may not be a lot of authentic leather bridles left.  I may make a couple of pieces from velvet but my main bridle will be leather. I feel like that will lay much better under the armor.


Medieval bits are crazy long by modern standards  (See above link and this bit  )I've seen them in photos over and over again as well as some drawings out on the internet.  This was to accommodate the fancy decoration rein on the bottom of the bit but the top of the bit  is where the thinner rein is placed.  I'm guessing this is the rein used to actually guide the horse.  The Rio Rondo traditional bits are close to being the correct length but for Medieval 1:12th but I wanted to try to build my own bits on this set.  I want to use as few "bought/premade" parts as possible.  That being said, I am still going to use the 3/32nds fancy western buckles from rio rondo because they look correct and making that many buckles would take months and months.

Initial cutout shape.  You can see what will be my demise, that tiny cut up there ! lol


Sanding and refining tools.

My Diamond cut dremel burrs.


When I make my own bits I make a cardboard stencil to draw out the bit with a bead reamer or any metal hard point to help block out the bit.  Then I cut out the bit from the metal and then I'll do the finer details with the dremel. Eventually I will etch with my dremel etcher. (which I hate but that's what I know how to use)


When I made this stencil I covered the edges in super glue to stiffen it up.  I haven't tried this in the past but it made sense to do now. When I cut out the bit shank I cut it as close as I can to the design and then dremel the rest.  My current dremel is one that has a cord. I've used the cordless ones in the past, and they are less expensive but I am rough on a dremel so it's turned out that the corded ones are best for me.

I am using the heavier gauge aluminum here- probably close to 30 - as I don't think that the 36 gauge will stand up to all of this working.  Silver is harder than this aluminum and that's what I'm used to working with but I'm going to give this a shot.

Make sure that you use safety glasses or some kind of eye protection when working with metal.  Even cutting out with the scissors and ESPECIALLY When you're using the dremel.  One mistake and you can get a shard of metal in your eye!  Also make sure that you do not breathe in the metal dust as you refine your metal pieces.  I blow out while I'm doing it and step away when I need to take a break to breathe normally again.  A mask is a great idea here.  Make sure any pets or kiddos are out of the room too because that dust can land on their fur. (My cats like to be near me when I work but thankfully they hate the dremel and walk away when I work with it)


After I get a good smoothed out shape, I can poke holes to start the rings on the bit.  I use a needle for this and a soft backing (Like the back of my upholstered chair or a leather forming sand bag) and pliers.  I put the needle in the pliers and then very carefully punch/push/work my way through the metal to make a hole.  I then use the bead reamer and make it large enough until one of my round dremel bits will go through.


The Needle I used to punch tiny holes to start forming the rings.

Be careful of metal fatigue.  If you work with your shank piece and it breaks at a weak part, that means that either you cut it too close or that it needs a redesign so that it doesn't break so easily.

I see that with all of the marking out of the metal, it's gotten scratched up.  I will try to buff this out or etch it to cover up those marks.  

And then bam.. metal fatigue and breakage. which means this will need some redesign.  You can see the bottom looks pretty good but when I started in the top, that little piece broke off.  So a slight redesign is in order. Maybe not as many curvy parts..
Metal Fatigue and there was a small cut on that part.
Back to some redesign.


For those paying attention, yes this is also how I make my western plates for my western saddles.  


Saturday, July 04, 2020

I am still alive and Now I'm working on Miniature Armor!


My Desk currently

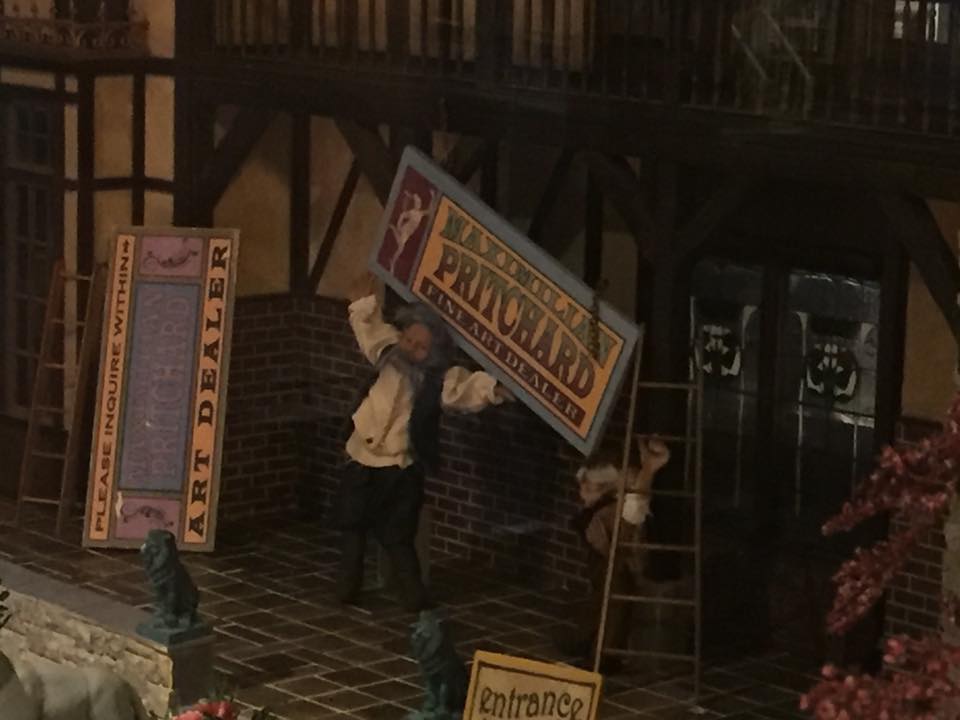
Last Summer while I was on vacation RJ and I went to the "The Great American Dollhouse Museum" in Danville Ky.  I love miniatures of all kinds, including doll houses even though the 1:12 Scale isn't the typical scale I work in.  

I loved it. It was amazing!!  Here are a few (or you know.. a lot) photos from there:


This girl is getting a halter. Already have it made!


IF anyone wants to donate a nice harness or two, there are several horses that need them.  One, that I remember is a dr's buggy horse.  Wish I had a photo!


Above one of the Cases there were actual, beautiful historic clothes.


mine and Rj's faces! 


in the back there is a wonderous fairy village!


While I was there I talked to Lori Moore about my work and about maybe making some donations to her wonderful museum!  We need places like this to get out of the house, and out of our heads and for inspiration and I want her museum to succeed! (this was before Covid so it still applies. Right now the museum is closed but please, if you're in Kentucky within 2 hours of Danville and the museum is open GO!)


In the back room when I was there, Lori showed me a three level castle that she obtained from a legendary store in Florida that she was going to put on display!  Of course, immediately I thought horse armor!   I have never made amour in miniature before but as always I'm game for new things.
(bottom picture on this page: https://www.thedollhousemuseum.com/friends.htm )

So after finishing a trade with Ann Bilon (that she was incredibly patient for) I am moving onto this new project.

Ann's Saddlseat Set


I have been having some trouble sleeping so I haven't had a ton of energy to throw into the amour project, until TODAY.  TODAY I am able to sit and do whatever I want and really mentally dig into the armor project.

On my Facebook Page I've been blurbing and talking about some of my process but I am going to try to open up and let folks into what I'm currently doing to research.

I watched these two videos today and they taught me so much!!
This first video is a 1920's silent video where the MET Museum showed off some of their armor and how it was actually used. (I found out about this video from the second video I listed below)This video taught me the differences between Jousting Armor and regular fighting armor. There isn't a lot of horse armor shown but by seeing how "People" armor was made I can guess how the horse armor was made.
Where he entertainingly puts to rest some of the popular myths about armor.
Lastly In watching these videos i'm coming to realize that the 36 gauge of aluminum I have may be too soft for anything other than display. I have delusions of actually articulating the neck armor with tiny watch screws. That is currently just a thought and not remotely a reality yet.. Also horse armor has hinges on it and I don't know if that thin aluminum can handle hinges. I have found a place where I can get thicker aluminum Here: http://www.whimsie.com/aluminumsheetmetal.html
Contemplating 34 or 32 or even 30 gague aluminum instead.
Turns out Home Depot and lowes carries "Aluminum Flashing" which looks to be similar so maybe I can go there and look and touch on some gauges of aluminum and figure this out 
Welcome to the last 3 hours in my head... LOLOLOL!!