(Not intended in any way as medical advice. This is just my experience.)
When I was a kid, I was diagnosed with ADHD. This was in the early 1980s and no one really knew what that meant at the time. I don't think my parents believed the drs either. I was labeled as careless, lazy, "Not living up to her potential". My parents disappointment in me was palpable.
My school years were entirely miserable. From the first grade on. I remember it. I legitimately thought I was stupid. This was due to the fact that I never thought like anyone else I knew, I had constant racing thoughts, rejection sensitivity (shut down if anyone criticized me at all), some terrible rumination and I was constantly grounded from about 3rd grade on.
 |
| A drawing from 8th grade. "New Year" |
Art was my refuge. I drew horses- ALLLL of the time. I could make a horse out of anything. Any craft object I was given, I made a horse. Any blank piece of paper, I drew a horse. When I was supposed to be taking notes, I would draw landing steeplechasers down the side of the paper.(because I have ADHD and it's far more fun to draw horses instead of listen to whatever the teacher was trying to say)
One time I had an art teacher tell my art class that: "If I gave you all a blank piece of paper, you wouldn't know what to do with it". So she gave the entire class a blank piece of paper. I drew an arabian charger with a bedouin on his back. :) No pictures, no prompts.. just what was in my head..
In order to keep my parents apprised in how I was doing in school, I had to carry an official piece of paper to each class and hand it to the teacher at the start, so they could record whether or not I did my homework (SO rare). Then I had to remember to pick it up at the end of class. This was absolute torture. A neurotypical's solution for how to handle my brain. A task I could never EVER consistently complete. ("Lets give a kid with memory problems something critical to remember!") I forgot to pick up that paper more times than I remembered it. Every time I left it at school(daily) my parents were livid and I would be grounded. I genuinely think this has contributed to my tendency to be a hermit now.
Depression obviously followed.(by 9th grade-thats another story- I am genetically predisposed to depression). Turns out, being constantly told I was that much of a failure was bad for my self esteem
I did go to college for a short period of time but It was too overwhelming. I loved my art classes there though! I worked very very hard in them..
I moved on with my life and forgot about having adhd. I still knew that I was different but I thought everyone's brain was the same way mine is and I just couldn't handle life. I struggled mightily with every day tasks but I was able to come up with coping mechanisms that for the most part that masked my ADHD.(although at the time I didn't know thats what I was doing) Not completely mind you, I still forgot things and still had all of the obvious symptoms but again, I chalked that up to just being dumb.
I learned to play pool pretty well(I still play!). I learned photography. I learned how to earn respect and praise at a job by working hard. I learned to triple check my work. (most of the time)
 |
| ONe of my favorite photos that I took. |
I learned as I hit my 30s that I'm not as dumb as I thought I was. I am actually fairly clever but I do not come to the same conclusions about things, the same way other people do. I started working in IT because it was easy for me to pick up. Maybe not necessarily the deep workings at that point, but if you gave me a piece of paper with the instructions on it I could follow it to the letter, perfectly and eventually expand on them.
 |
| one of my very early saddles owned by Rosemary Simeon |
I bought a Rio Rondo Western saddle kit and it taught me how to make saddles. At the time, I was already making halters and bridles (something I also had done as a kid) but that saddle kit opened whole new world for me.. A new passion, and the confidence that maybe I really wasn't stupid, maybe I have a brain that was meant to do art and I've been forcing it to do other things. It was literally life changing for me. Miniature tack became my Zen and my lifeline to be able to recover each evening and each weekend from the trauma (I said trauma and I mean it) from working and having to deal with the outside world every day. I still didn't know why I couldn't function "like everyone else" but my miniatures helped keep my soul happy.
 |
| Miniature Arabian Native Halter that was woven on a loom |
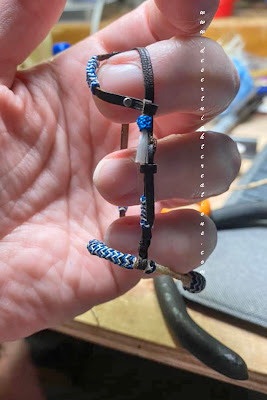
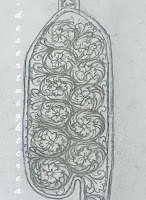
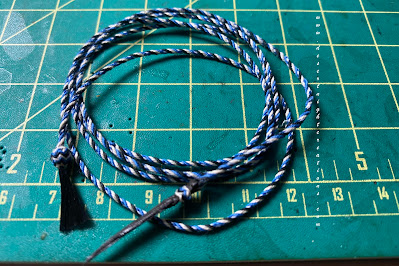
I learned miniature leather tooling, braidwork, silver working, weaving - I found that if I could come up with an idea on how to make something, I could make it happen! I eventually was able to look at a piece of tack and for the most part, know how it was made.
In my late 30s I started working for an amazing company that fufilled a community need and was not focused on dollars but on people and making their lives better. The culture was pretty good too and I was given the proper training for things and I flourished. I realized maybe I'm smarter than I thought and I was finally able to teach myself and learn new things without fear. I was supported and they constantly threw new things at me that I was actually able to, and wanted to, learn...
I realized that maybe I just needed to be taught how to do things differently... Hands on, with specific directions so that I could memorize what I was doing and eventually expand past it.
I was feeling pretty good about things until I hit menopause. HOLY SH*T did things change.. As a woman's hormones shift, the effect on concentration and brain function change dramatically. That has definitely happened with me.
Intense Dementia-like Brain fog. Weight Gain from ravenous appetite. Sleep Disturbances to the point where I couldn't even get through a day without a nap; Let alone sleep through the night. Forgetting Everything- including setting up reminders to NOT forget. Not able to concentrate for long periods of time. Hot flashes. Frustration. Imgine working with all men and having to even try to explain any of that.(and I didn't.. I was ashamed of being female and "older") I had a boss that I confided in at the time about my brain fog and in my year end review he mentioned it as a reason that my performance wasn't up to par.
I was also struggling with making things. I literally could not focus for a 30 minutes in a row. I woud do a knot and then have to surf the web on my phone. Then do another knot and surf the web on my phone. Entire saturdays just flew by like this with little progress on my miniatures work.
I see why in the "olden times", older women just drank Laudanum and sat around and slowly went "insane". lol
I knew about hot flashes but not the rest of it. At first I really thought I had dementia and that things were very very very very wrong and it was so scary. I had no support for it really, anywhere. Most OB/GYN practices are baby focused, not menopause focused. Thankfully there was one dr at my ob/gyn that prescribed some HRT for me but it still doesn't help everything.
Then, the company I worked for—a place that did a lot of community good and had a decent culture—was bought by a giant corporation that couldn’t have been more different. The only thing in my life at that time, that was stable (other than my son) was my job.
Everything at work was the same for a while but starting in January 2024, I had a new role thrust on me. There was no relevent training for my new role and no supportive company culture. I've had to fight to gain new knowledge and try like hell to learn on the side. So much of what I went through (and am still going through) mimic'd the failure I felt in school. But i'm trying and striving to learn every day now that I know that I CAN learn..
Last summer, after conferring with a new therapist (BLESS HER) I went to get re-tested for ADHD. Shockingly, the tests stated that I have ADHD. But I GET IT this time. Now science knows SO MUCH MORE about the ADHD Brain.
First and formost, the adhd brain is not a chemical imbalance. It is a Brain type. ADHD Brains are formed differently than a neurotypical brain. (you can google this) Why does this matter to me? Because I am exactly who my brain has dictated I be. I cannot be anyone else. I cannot function in any other way than how I am functioning now. Good or bad. This is who I am. There is SO MUCH DEEP comfort in that knowledge.
Secondly, the effect of menopause on the ADHD brain is dramatic. My ADHD now is about 1000% worse than it's ever been in my life. It is severe. There is no way I can deny it now. I have had to completely refactor my life. I am not the person I was in my 30s or 40s. In fact the way that person in my 30's and 40s functioned is impossible for me now. I have a new reality. I am learning how to handle my life all over again. I can no longer mask. I can no longer strive to be "normal" every day and act "normal" every day. My emotions are deeper (like how? they were deep before?) and I just let them ride now instead of tucking them away and feeling them later like I used to be able to do.
I read a LOT of posts on reddit about adhd and menopause. It is so cathartic to finally feel like I'm not alone. It has also helped me make sense of what I'm going through along with my therapist.
One good thing about my company though, is that I can work from home. My therapist gave me a work accomodation letter stating that I needed to work from home due to my depression and ADHD. Without that I would probably be without a job.. At home I can 100% control my surroundings and I actually work longer and harder. Before that, I was having panic attacks before going into work. It all felt so overwhelming and complicated to get up, get breakfast, get a shower, do my hair and makeup, and drive into work. I was getting stomach cramps and migraines every single day. Then I would sweat profusely which would undo all of the work on my hair and makeup. I was a downright puddle of mess.. I'm so grateful that I can work from home during this time.
I am better now than I was 2 or 3 years ago. Even better now than I was last year. I have made some pretty big changes in my life (see two posts ago) and I am now able to work on my miniatures with a little more focus. And they bring me SO MUCH JOY!!! Now more than ever.
Please stay tuned to see new works.. :) I know this was a long "blah blah" post but thanks for reading to the end :)


.jpg)
.jpg)


